Simple Gallery is free, responsive and easy-to-use image gallery based on selected File Set.
For concrete5 8.2.1+ use the highest version of 1.x.x branch.
Simple Gallery was tested and works with modern browsers (latest versions of chrome, firefox, safari, edge).
Features
- Create galleries based on selected File Set
- Implemented lightbox: Magnific Popup
- You can display original or resized (using image helper) thumbnails/fullscreen images
- You can set width and height of thumbnails/fullscreen images
- You can set number of columns depending on device type (phone/tablet/desktop)
- You can set space between images
- Available methods of displaying lightbox captions:
- Do not display captions
- Display captions based on File Titles (you can edit them in Dashboard/File Manager)
- Display common caption based on Page Name (you can edit it in Dashboard/Sitemap)
- Display common caption
- You can order/assigning images to File Set in File Manager/File Sets dashboard pages (link to them is displayed while editing block)
Documentation
Add / edit gallery
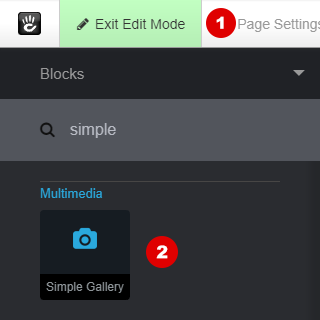
Enter edit mode (1), find Simple Gallery block in list on the left (2) and drag it to area of your choice.
Remember: You need to upload images and assign them do File Set before adding block (read next paragraph).
Add / order images
- To add new images and assign them to File Sets, go to: Dashboard / Files / File Manager (3) and upload your files (4).
- It is advised to organize them in folders, but it's not required.
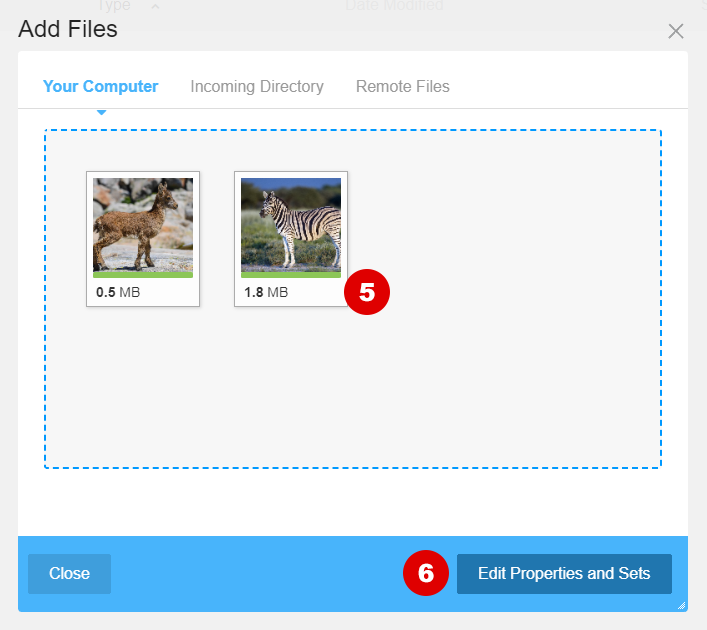
- Click empty space in area or drag images from your computer into that gray area to start uploading (5). When it finishes, click Edit Properties and Sets (6).
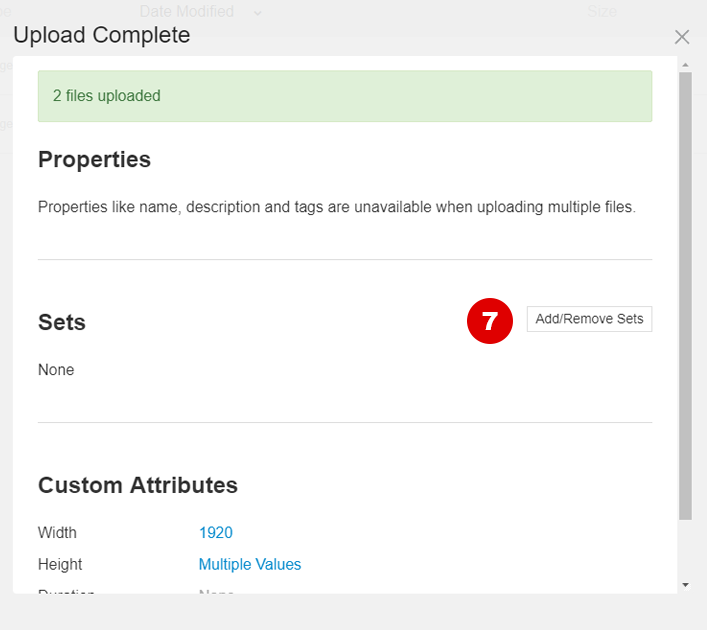
- Click Add/Remove Sets (7).
- New window will open. Assign uploaded images to one of existing File Sets (8) or create new one (9). Click Save (10) and close previous window.
- Now, with images being uploaded and assigned to File Set, click Return to Website and add Simple Gallery block to your page.
Block Settings
Basic information
File Set
Choose File Set (created earlier). Use link in help text to go to page (11), where you can change order of images.
On File Set page, you can change name of File Set (12) or permanently delete it (13) (though images will not be removed).
To change order, click image (14) and drag it up or down. If list is very long, you can use Home, End, Page Up, Page Down keys on your keyboard to move across page while still dragging image.
Remember to click Save button (15) at the end.
To remove image from File Set, go to Dashboard/File Manager,
If you organized your files into folders, you can use Jump to Folder (16) functionality or just crawl through folder tree.
If not, search your File Set by clicking Advanced/Edit inside search field (17). In opened window click Add Field, select File Set field, choose your actual File Set and then click Search.
When you finish, you can click Reset search to see all files and folders.
Finally, to remove image from File Set, right click image and:
- choose Sets (18), uncheck checked File Set and click Save.
or - choose Delete (19) (obviously it will permanently delete file from CMS)
Lightbox captions:
Do not display captions
Lightbox captions will not be displayed.
Display captions based on File Titles
Go to Dashboard/File Manager.
Right click image and choose Properties (20). Find Title row (21) and click link on the right. Edit field and click check button. Done.
Display common caption based on Page Name
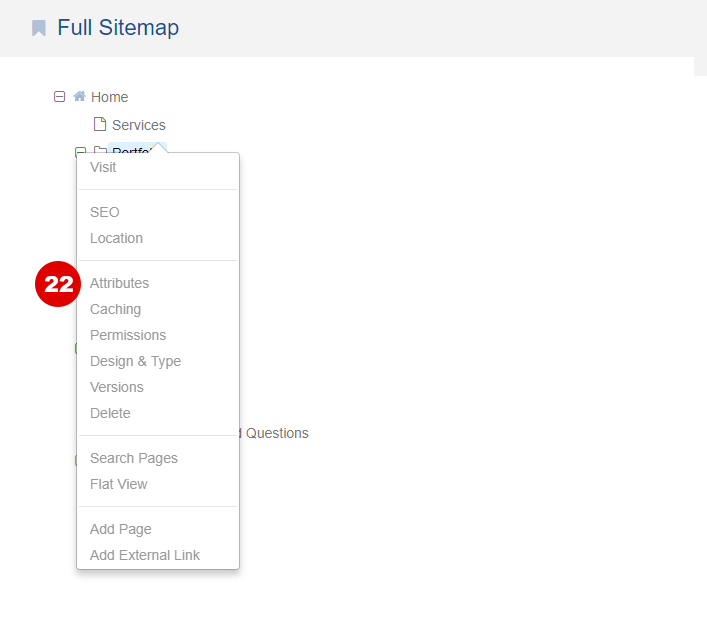
Go to Dashboard/Sitemap. Click page, where you added gallery. Choose Attributes (22) from menu. Name (23) is the field, which you are looking for.
Display common caption
Just enter your custom title.
Dimensions
- You can set only width, only height, or both of them.
Images smaller than provided dimensions will not be resized/cropped (will use original image urls). - Leave empty fields to use original images for thumbnails or fullscreen images (no cropping and resizing).
- Cropping images requires width and height. It will make all images the same size (assuming they are large enough).
- Personally, I advise to upload images with correct dimensions (for example, no bigger than 1920x1080px), resize and crop thumbnails (image urls will change every time you clear cache), but leave Fullscreen images fields empty (image urls will not change every time you clear cache)
- You can set number of columns depending on device type (phone/tablet/desktop).
Personally, I advise to set thumbnail width a little bigger than rendered. This way images will look better on retina devices. - You can set space between images.

